
This lab series guides you from the initial deployment of pfSense. Then, it progresses to advanced configurations. It provides a structured, step-by-step journey through every major feature. If you missed any of the other parts, they are linked below. This way, you can catch up and get the most from the full lab experience.
- pfSense Series: Simple Setup & Introduction
- pfSense Lab Part 2: Master pfBlockerNG Package
- Deploying pfSense: Complete Lab Series Part 3 – IDS/IPS With Snort
- pfSense Lab Part 4: Captive Portal with AD
- Secure Your Network with pfSense and Squid Proxy
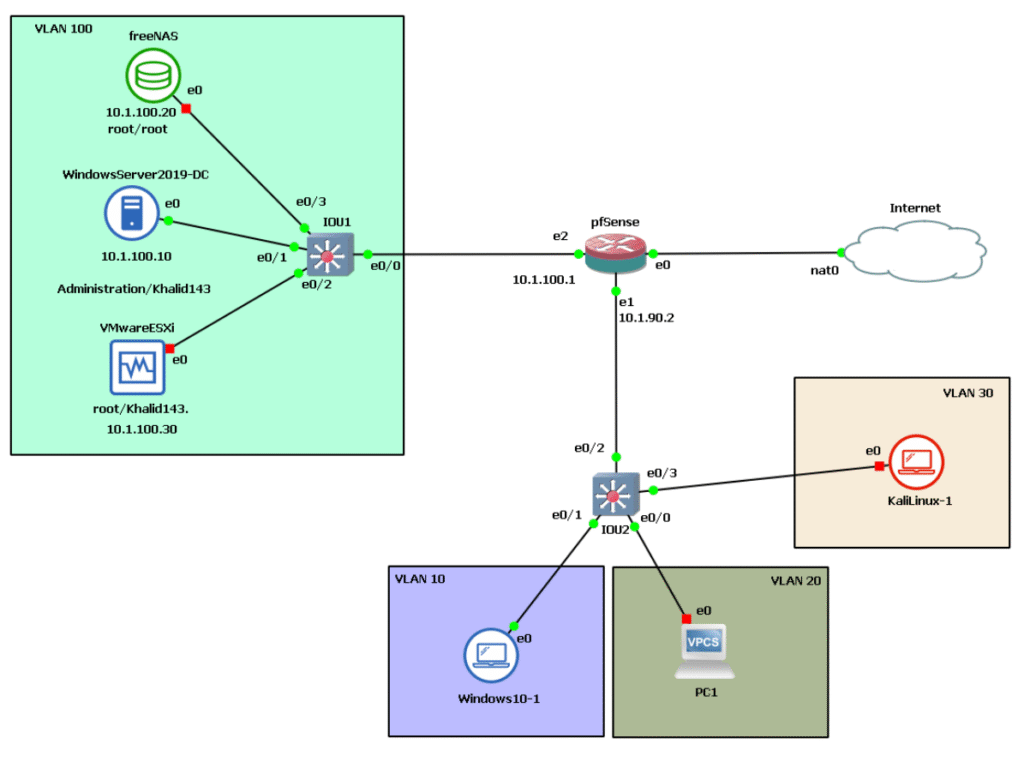
As a reminder, here’s the architecture below we’re working with.
Problem Statement
A growing company needs to expand support services to customers in new regions across multiple countries, adding a remote branch.
The challenge: securely link the new site to main office resources in the home country without duplicating the entire IT infrastructure or incurring high WAN connection costs.
Full replication would be overkill and expensive for a small remote team without a dedicated IT staff. A virtual private network (VPN) solves this elegantly by creating an encrypted tunnel over the public internet.
So, how can we implement an alternative solution without having to pay WAN connection fees and without replicating the site?
Hypothesis
Another effective solution is to establish a virtual private network (VPN) between the two offices. A VPN creates a secure, encrypted tunnel between devices over an unsecured network like the internet. This ensures that all data transmitted through the VPN remains encrypted and protected from hackers or unauthorized access.
Here are the advantages of using a VPN:
- Using a VPN will save you money because it is free.
- VPN ensures the security of all your traffic sent through the VPN tunnel.
- A VPN supports scalability, so more remote sites and users can securely connect to the corporate network+.
Site-to-Site VPN
- A site-to-site VPN is a private network that securely connects separate intranets, enabling users on these networks to access each other’s resources safely.
- A site-to-site VPN is ideal for companies with multiple locations, each having its own local area network (LAN) connected through a wide area network (WAN). It is also beneficial for securely transferring files between two separate intranets without allowing users on one intranet direct access to the other.
- Each location will require a VPN concentrator to establish and terminate the VPN tunnel. A VPN concentrator is a router or firewall capable of establishing a VPN connection between itself and a VPN client or another VPN concentrator.
Client-Server VPN
Connecting through a VPN client is like linking your home PC to the office network with an extension cable. Employees can securely access the company network from their home office and work as if they were physically in the office. However, the VPN client must be installed and properly configured on the computer first.
The firewall administrator can set up the remote access VPN for users in one of the following modes:
- Full Tunnel
In Full Tunnel mode, all internet-bound traffic from the client PC is routed through the VPN tunnel to the VPN hub, which then forwards it to the internet. All return traffic follows the same path back to the client PC. - Split Tunnel
In Split Tunnel mode, only traffic destined for the company network will be encrypted and sent through the VPN tunnel. Traffic destined for the internet will not be sent through the VPN tunnel but rather
directly to the internet from the user’s PC. This mode creates less overhead on the VPN tunnel and reduces CPU and RAM consumption on the VPN concentrator. - Clientless VPN
With a Clientless VPN, it is not necessary to install a VPN client on the user’s machine. However, the connection is encrypted and secured between the client’s web browser and the VPN concentrator using SSL (Secure Sockets Layer) or TLS (Transport Layer Security) encryption over HTTPS. Traffic between the web browser and the VPN concentrator is encrypted; all other traffic is not.
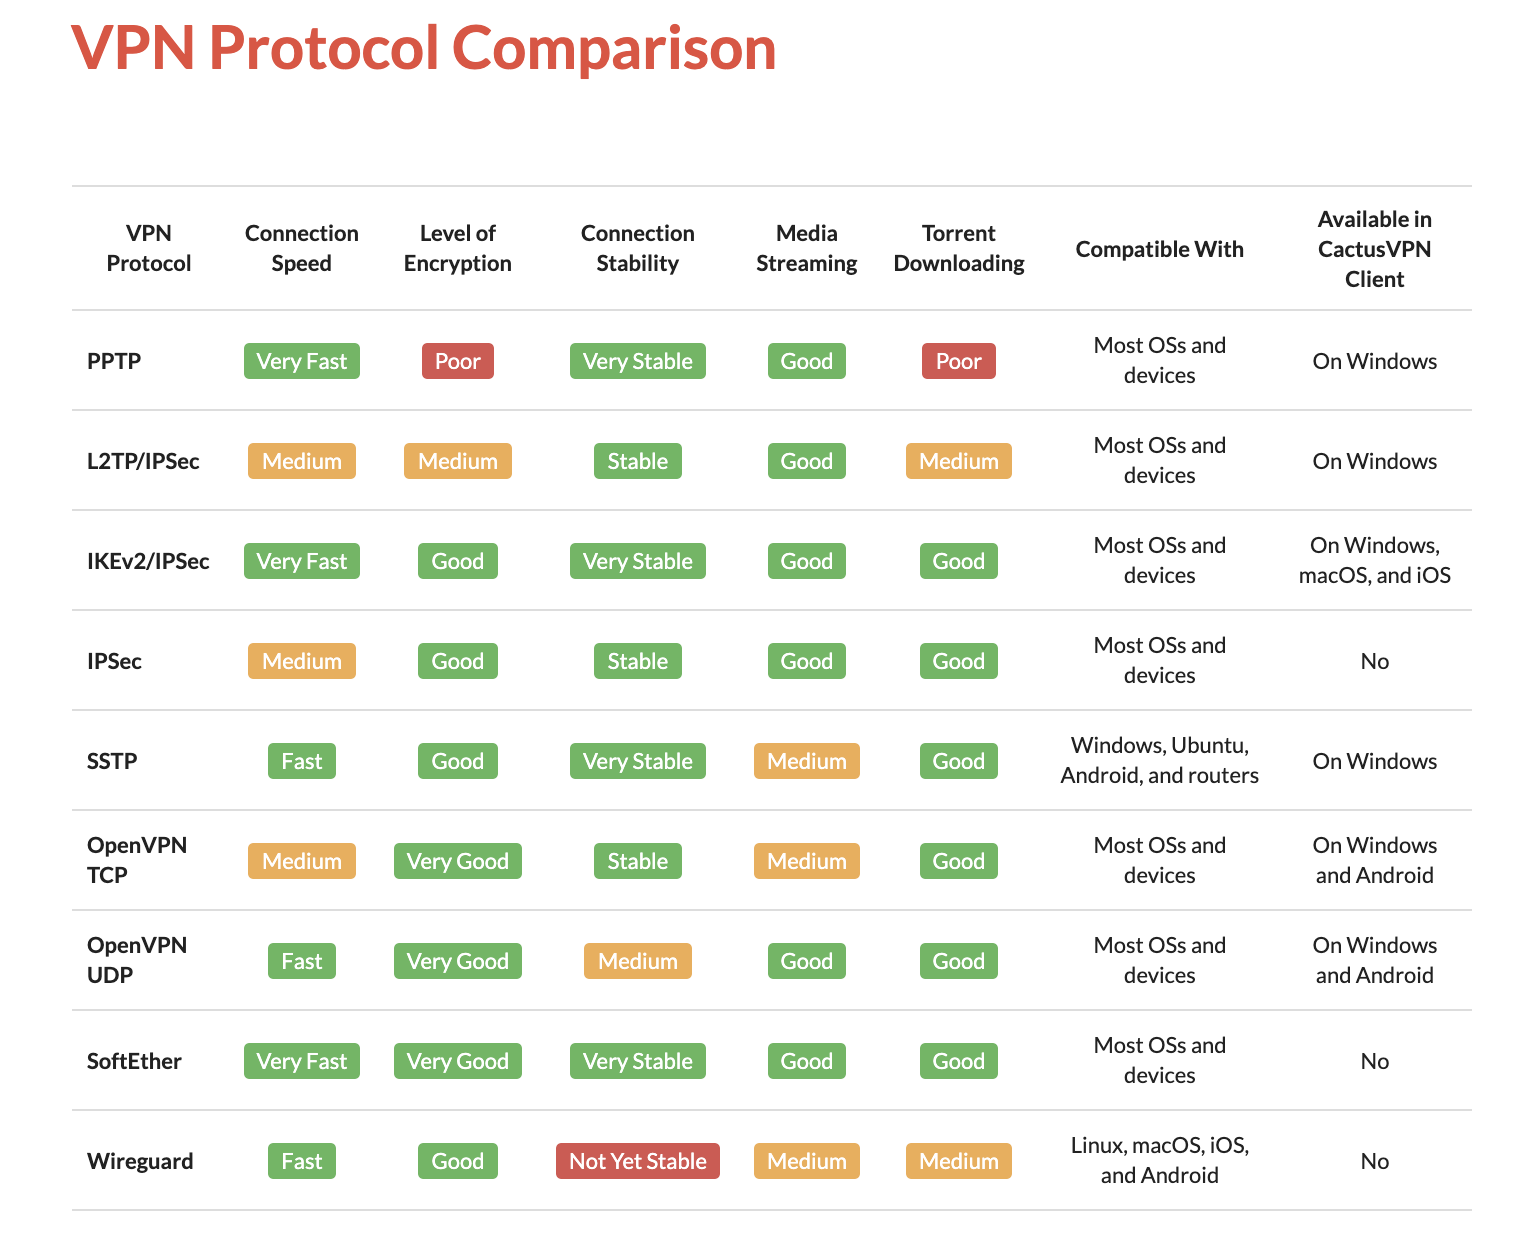
VPN Protocols
Not all VPNs are created equally. Depending on its VPN protocol, it can have different speeds, capabilities, or even security and privacy vulnerabilities. There are different types of VPNs.
Advantages and Disadvantages
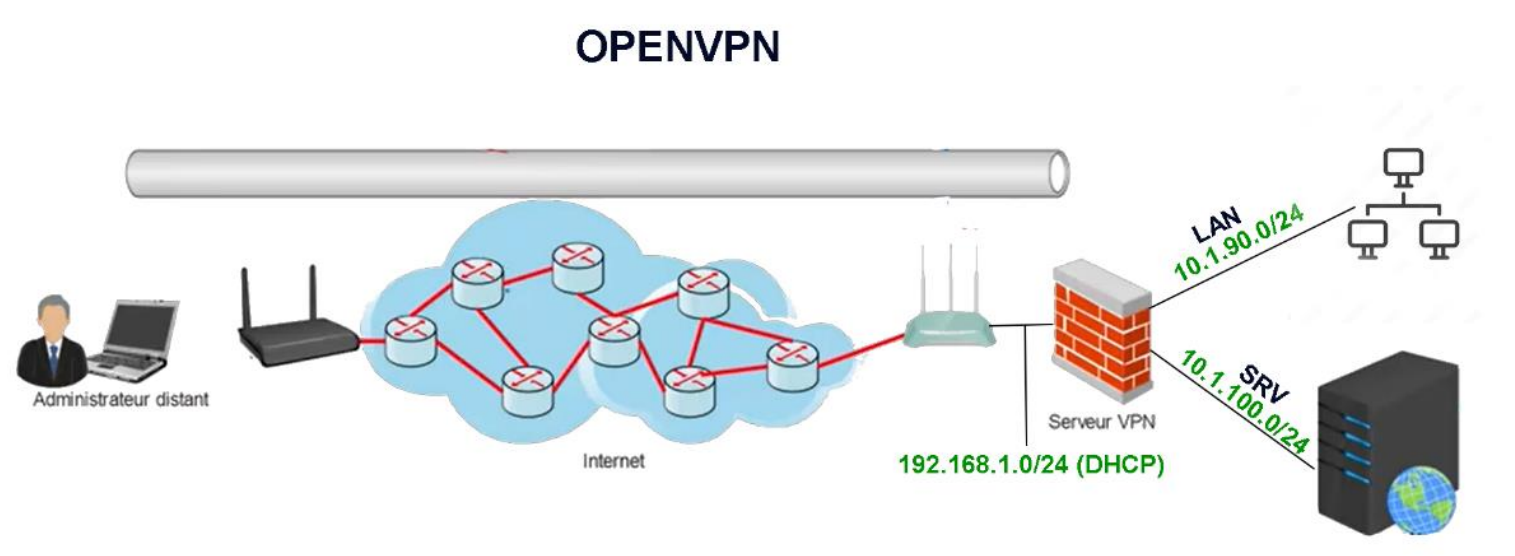
VPN implementation in our topology
Challenges Encountered During VPN Implementation:
The router’s IP address changes dynamically, preventing the establishment of a static IP for external site connections. Resolving this requires purchasing a static IP from the ISP, which proves prohibitively expensive.
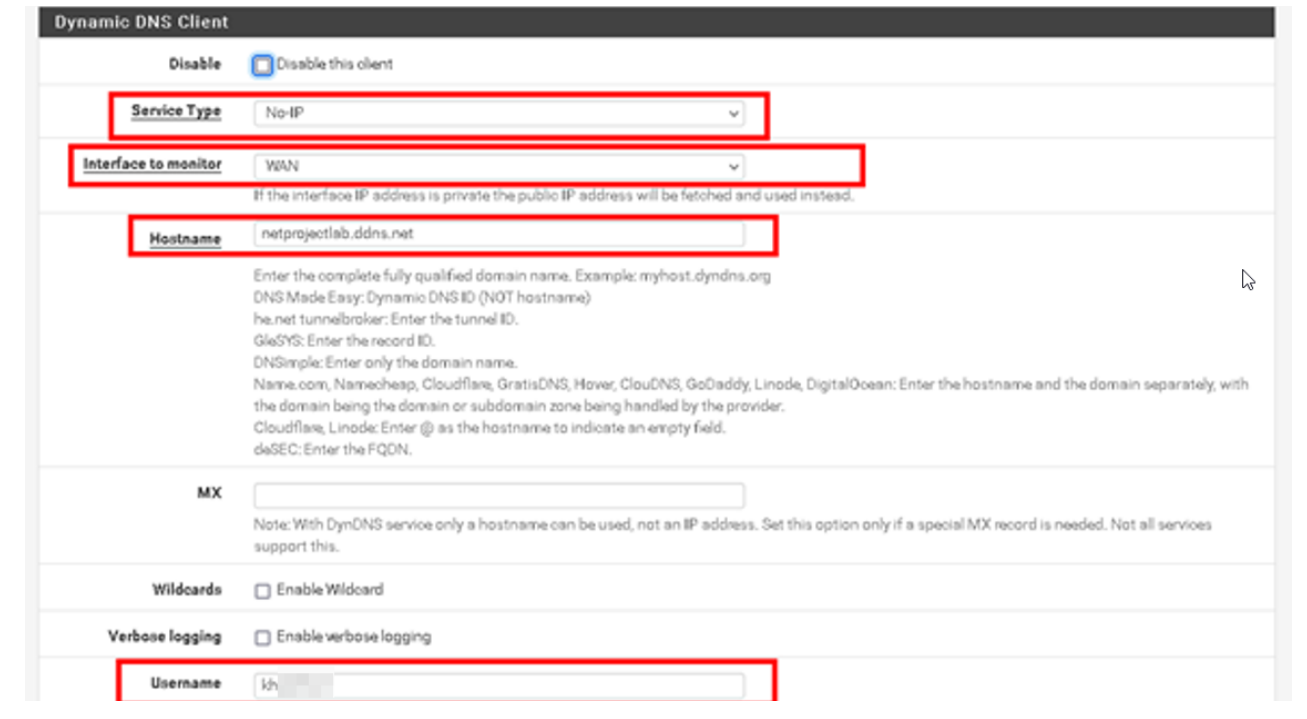
As an alternative, I implemented DynDNS technology, which automatically updates traditional DNS records without manual intervention, enabling seamless and immediate changes via a lightweight client updater.
Using port forwarding (port mapping), I redirected VPN communication requests from the pfSense WAN address and port combination to the router as packets traversed the gateway.
No-Ip provides a free DDNS service, allowing remote device access without a static IP, and integrates directly with pfSense.


After configuring dynDNS on our firewall, we can successfully check the IP address changes on the no-IP website.
Configuration of OpenVPN on pfSense
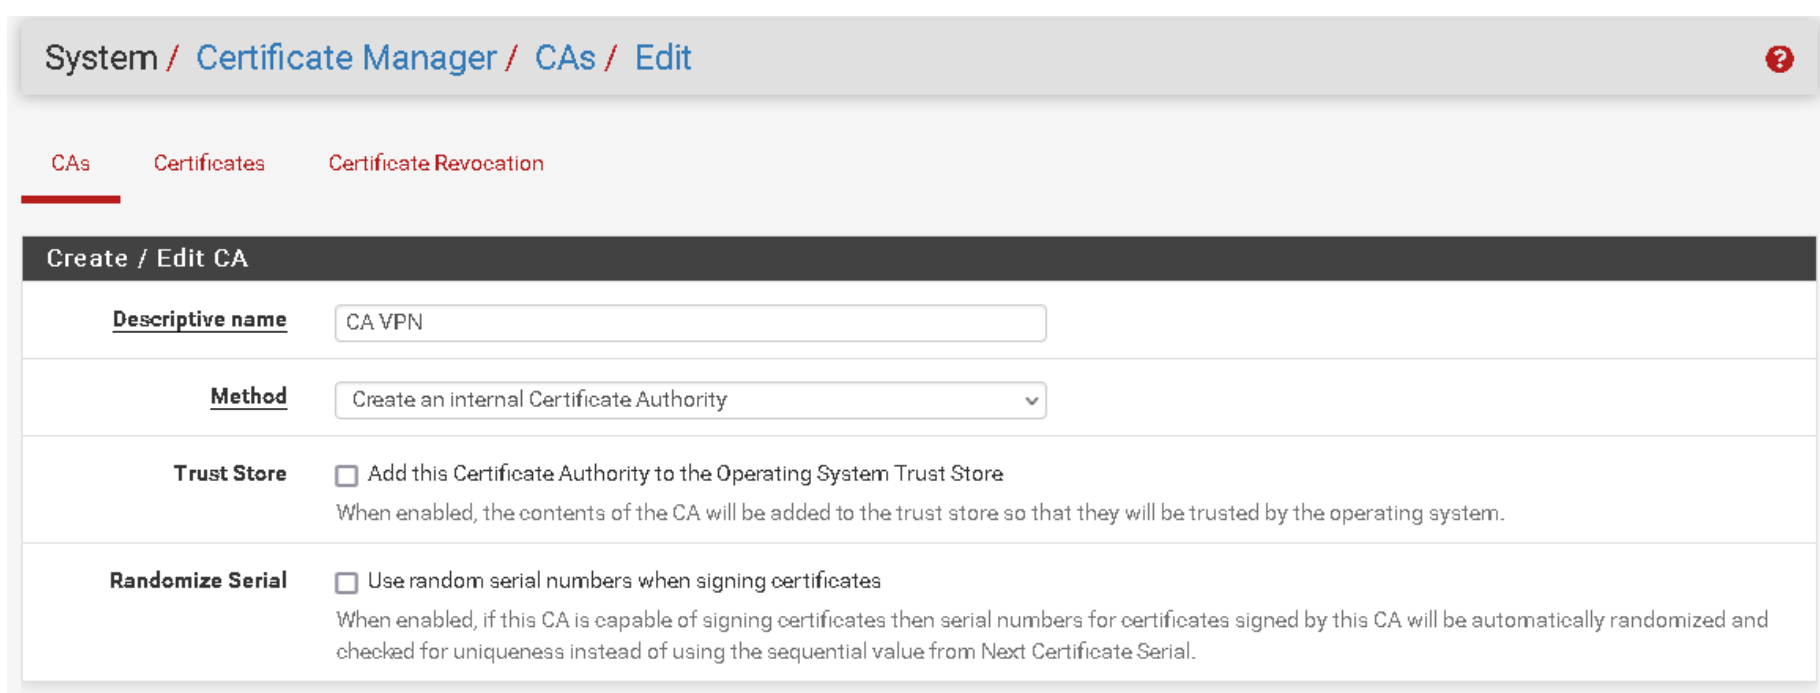
OpenVPN supports bidirectional certificate-based authentication, requiring the client to verify the server’s certificate and the server to verify the client’s certificate before mutual trust is established. To achieve this, we must create three certificates:
The certification authority: the entity that issues digital certificates.
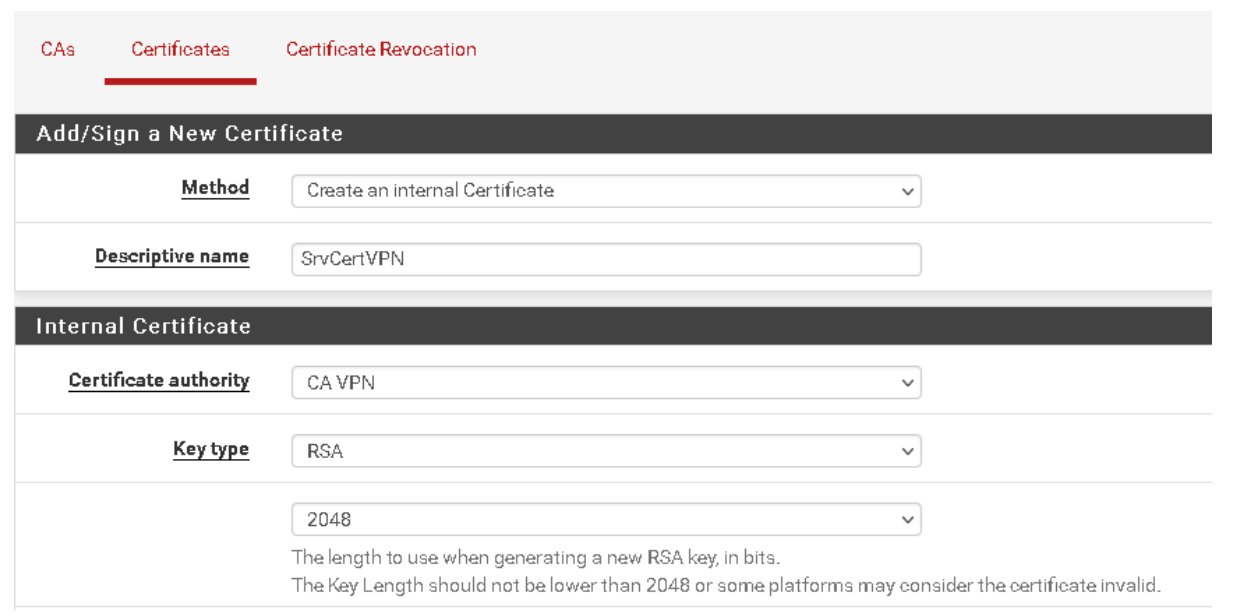
Server certificate: used to authenticate the identity of a server.

Client certificate: to guarantee to the server that it is communicating with a legitimate user. (Validation of a client’s identity)
Creating a client and assigning them a certificate
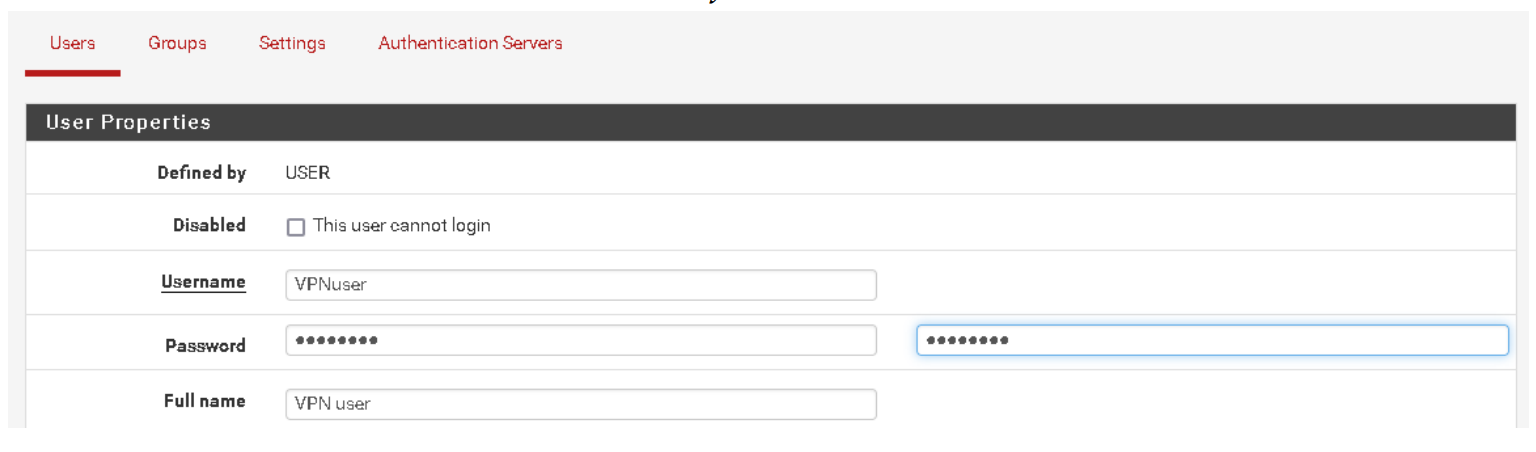
Creating a local user authorised to access the VPN via the Internet.
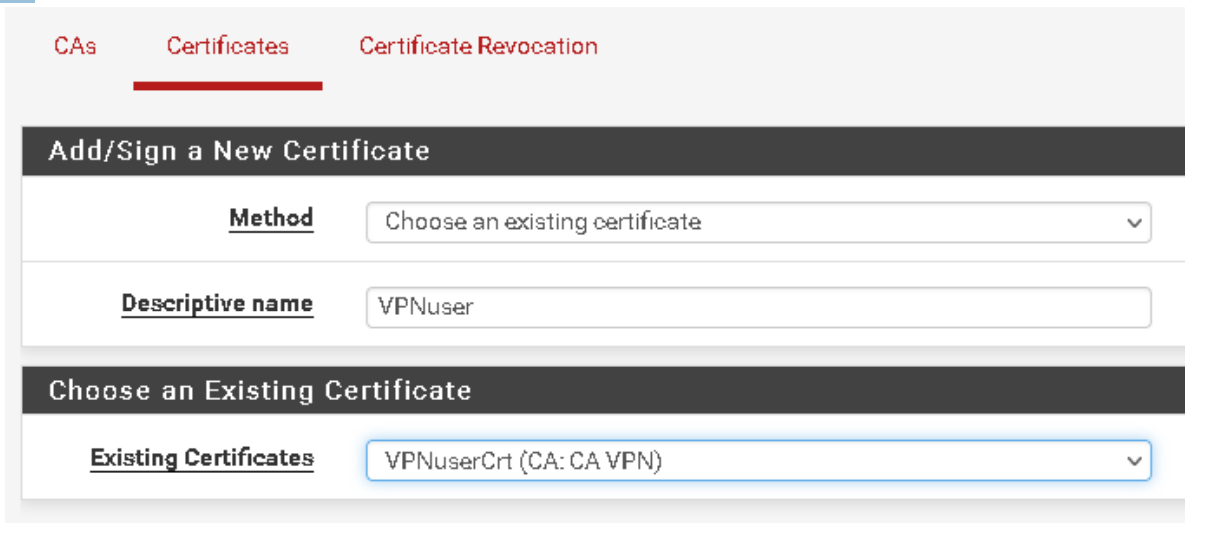
It is time to create a user certificate for the user we created above and assign the certificate to that user.

Assignment
For automatic export of the OpenVPN configuration, we use a package called openVPNclient-export.

OpenVPN configuration
For this configuration, I will use the wizard to help me.
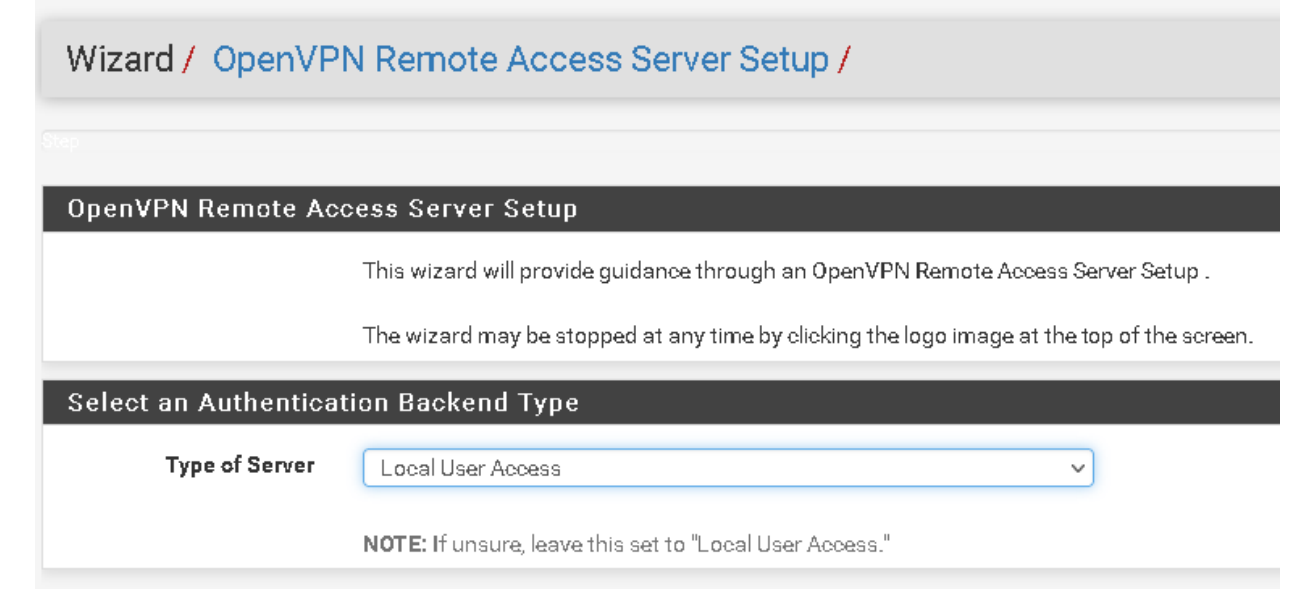
The wizard asked about the type of authentication backend; we have already configured a user, so I will choose local user access.
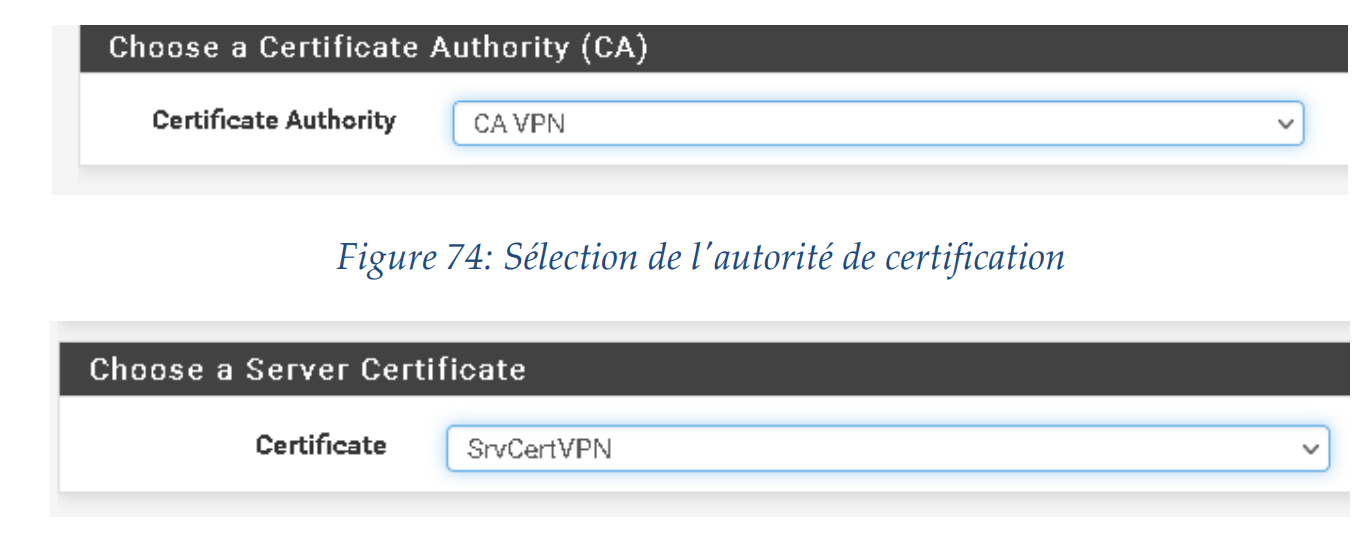
Now it is asking us for the CA and server certification that we created previously.
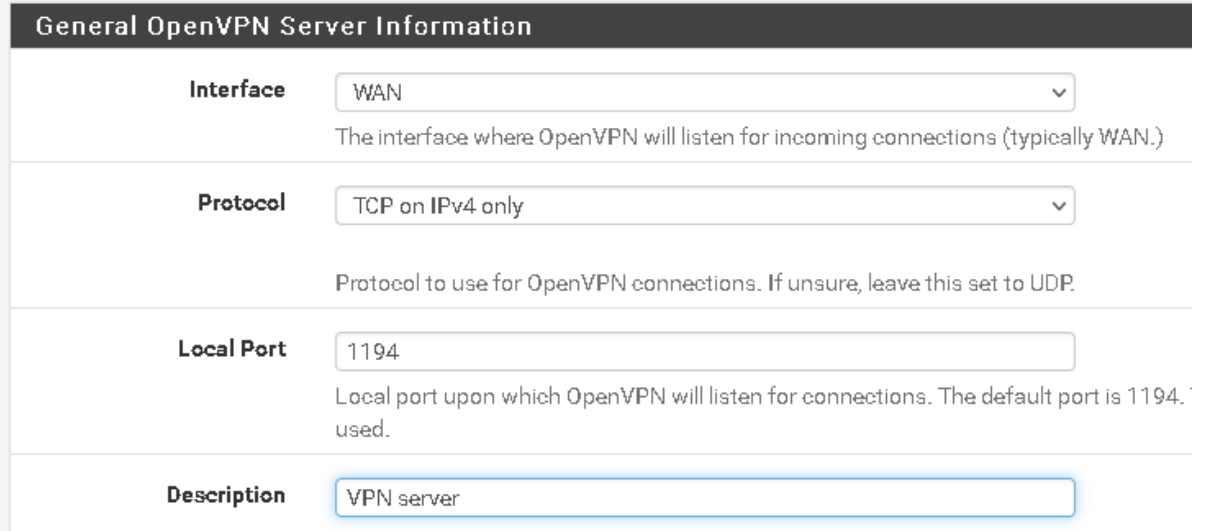
Now, it asks us which port and protocol the server will use to listen.
It also gives us encryption algorithm options to choose from (I chose 128-bit to avoid exhausting my host’s resources).
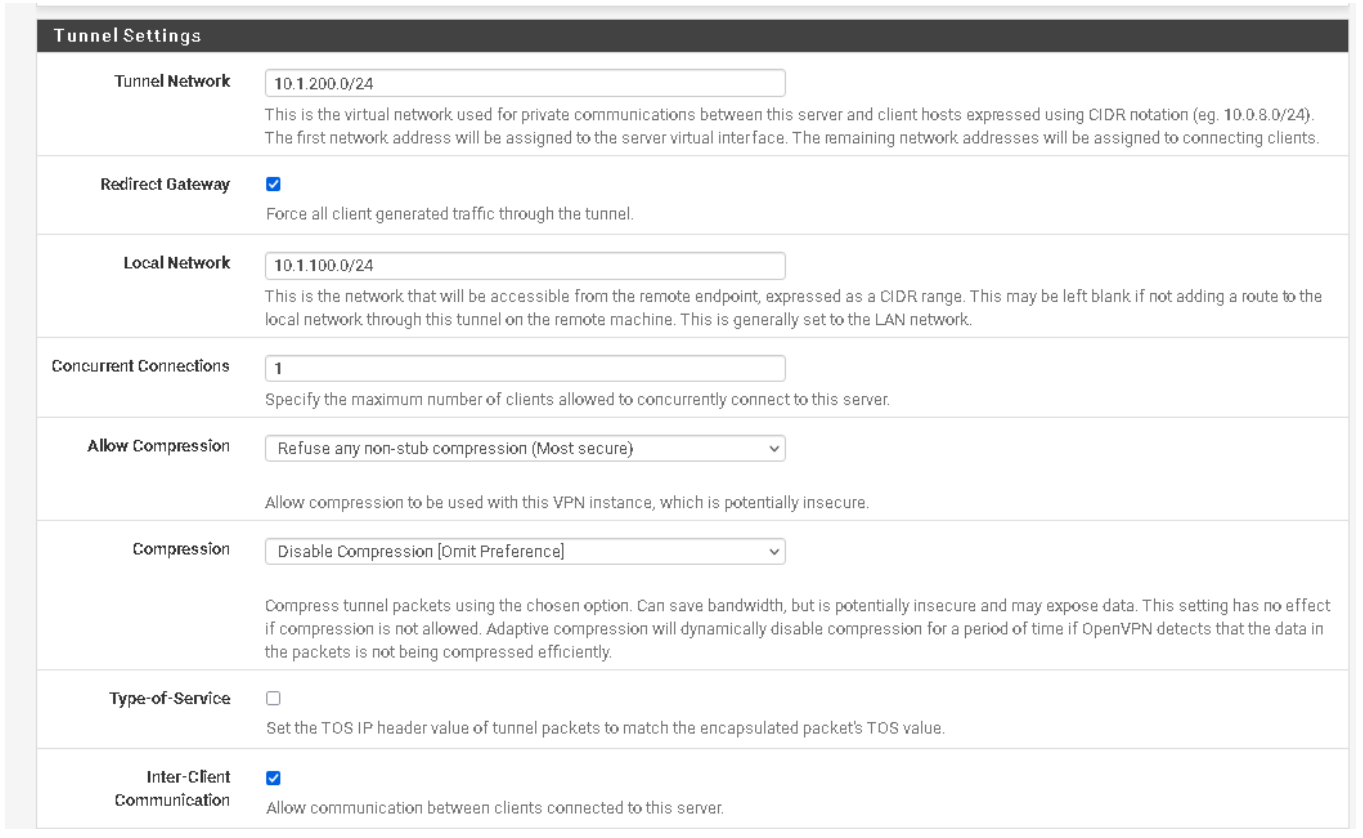
We need to assign a network to the tunnel to enable communication between the server and client. At the gateway level, pfSense automatically creates a virtual network adapter that routes traffic from the tunnel network to our LAN and beyond.
Local Network: is the network that will be accessible from the remote endpoint.
Concurrent Connections: specify the maximum number of clients allowed to connect simultaneously to this server.
We can also define whether we want to compress our packet to conserve bandwidth and also define whether we want to allow communication between clients.
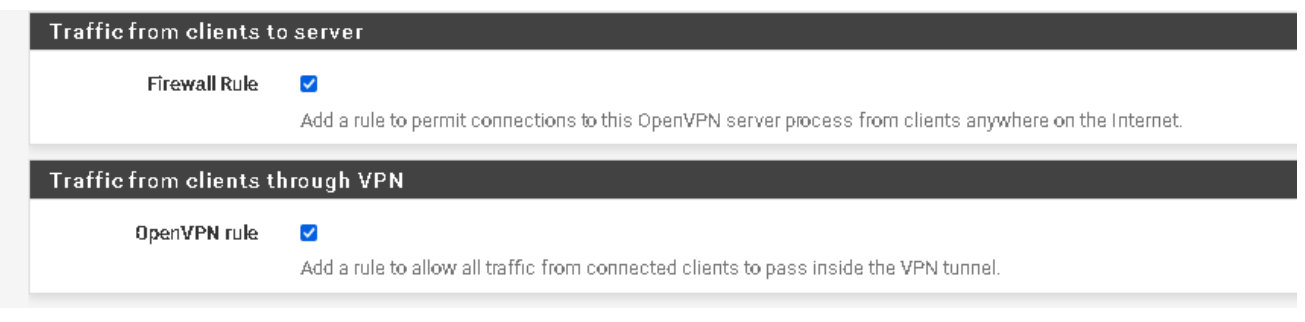
We create a rule that opens OpenVPN and makes it accessible from the internet, allowing authorized users to use the channel.

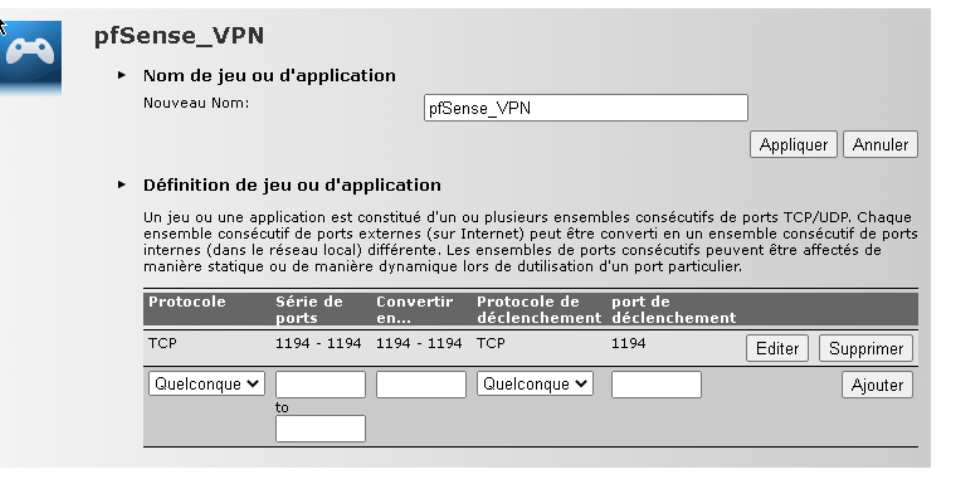
Port-Forwarding sur TD5130 v3
We are performing port forwarding so we can access the service from the Internet.
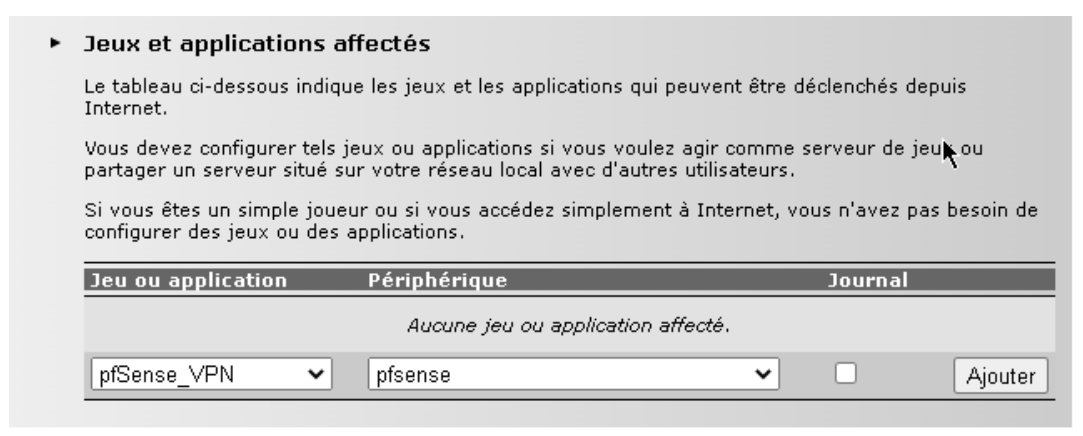
We assign the host to the application we created so that it can be transmitted.
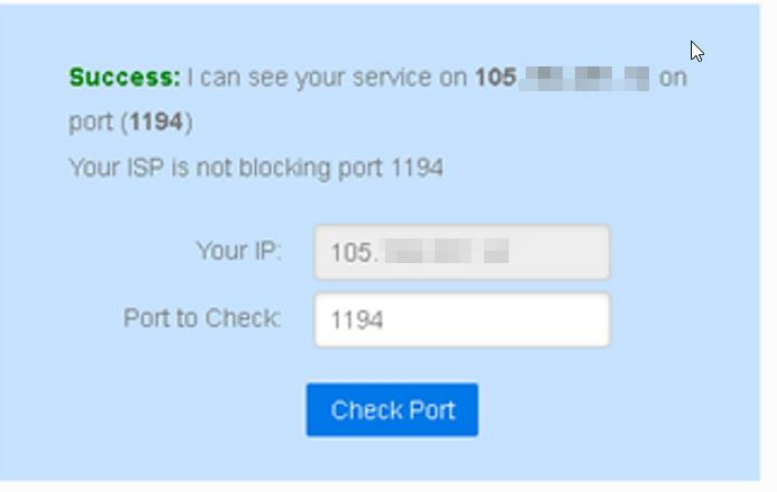
I used the website (canyouseeme.org) to check if the port is open.
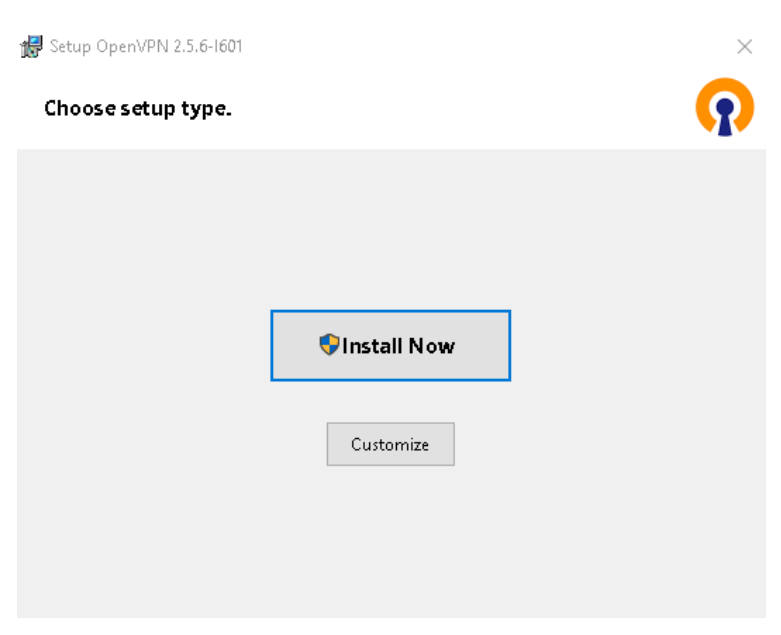
Now we need to install the OpenVPN client on our host that we want to connect to our VPN server.
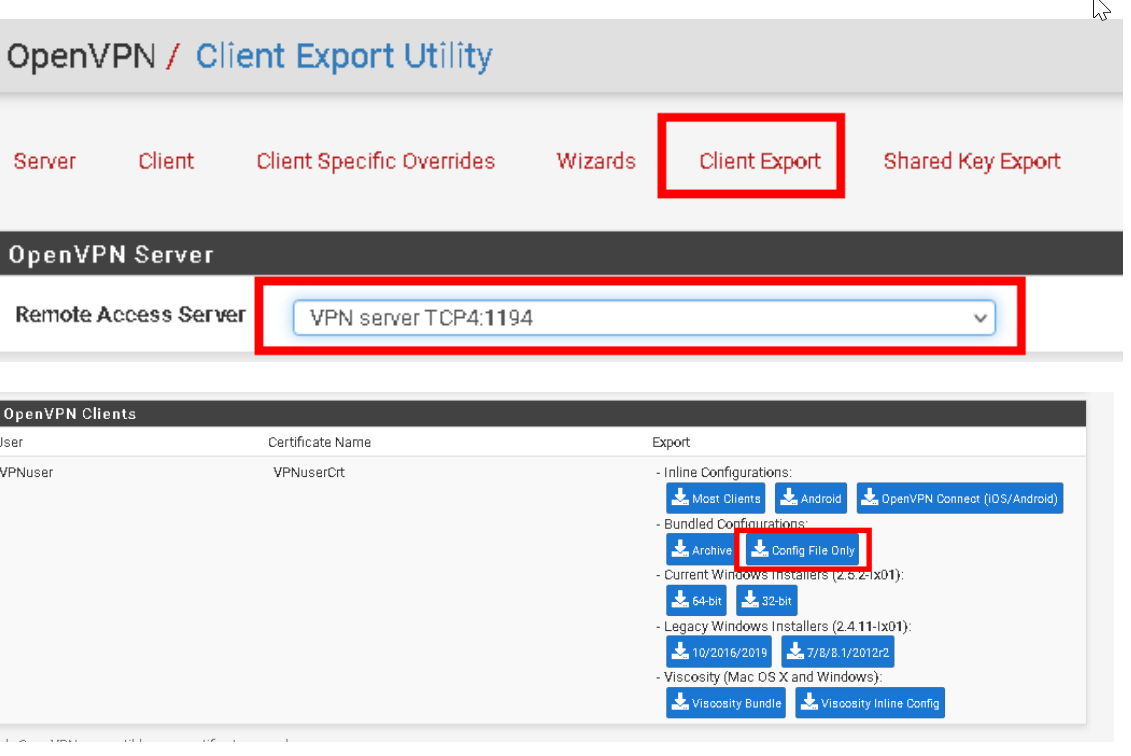
Exporting the configuration from pfSense: If all the configuration is set up correctly, we should now be able to download different versions of the client to connect to the OpenVPN server.
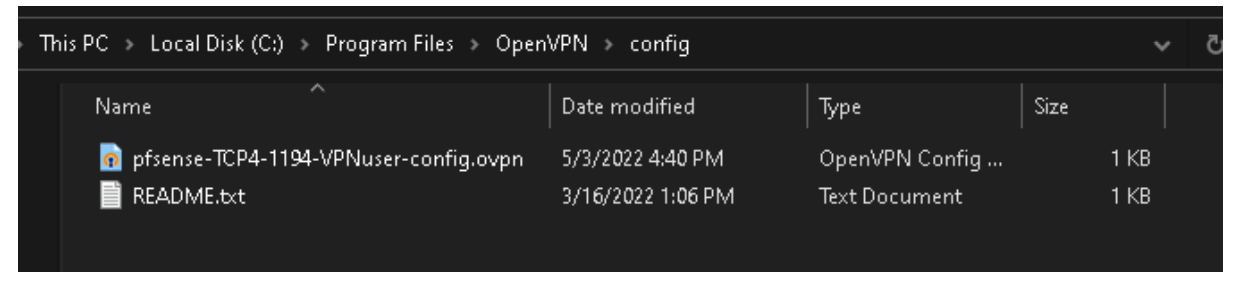
We now need to move the configuration file to the Client (C:\Program Files\OpenVPN\config).
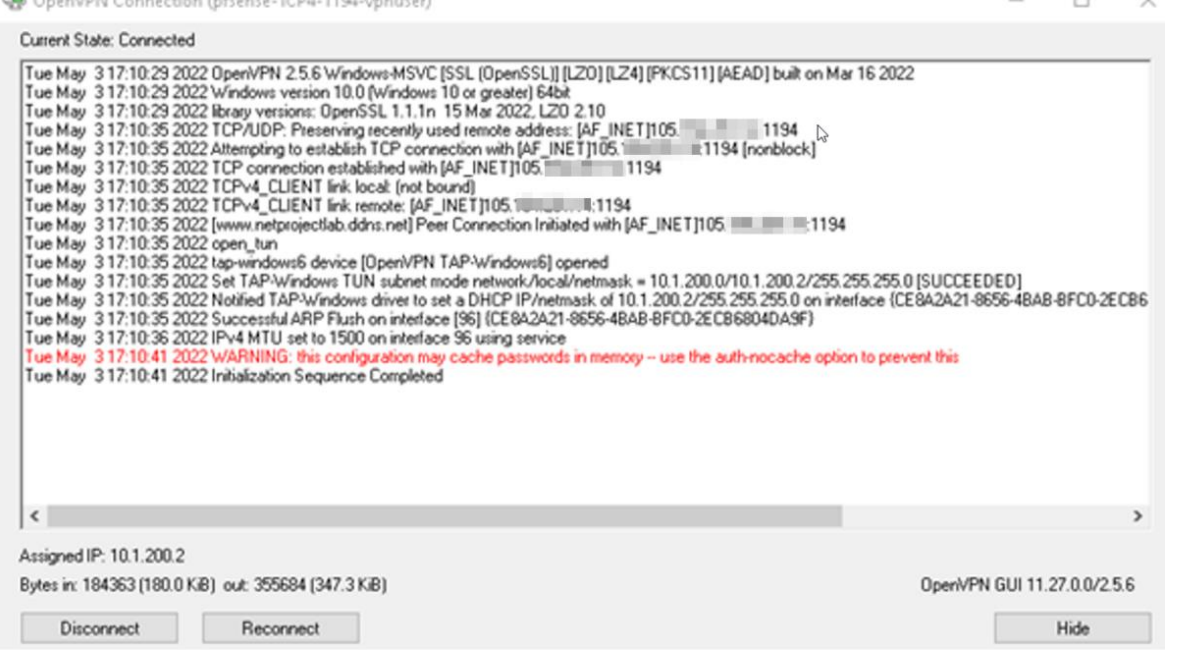
We are launching the openVPN graphical interface.
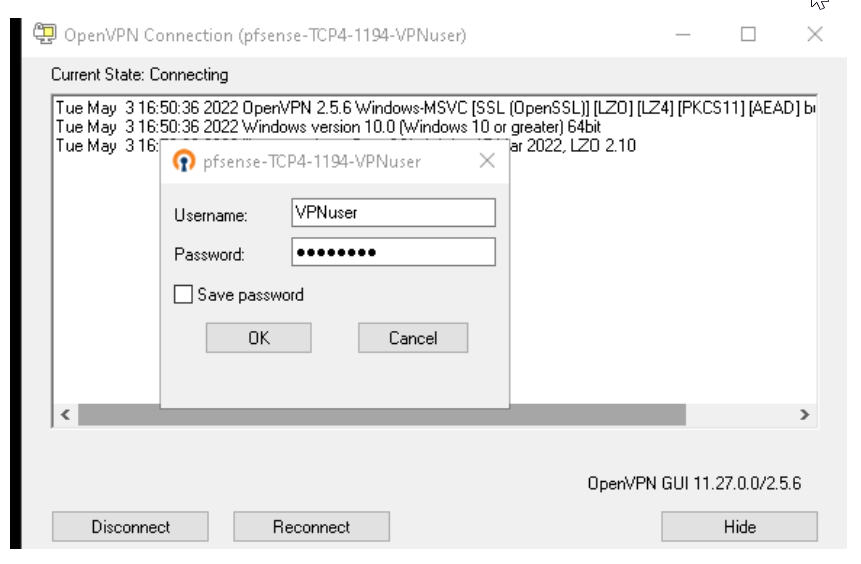
We successfully connected to the VPN.

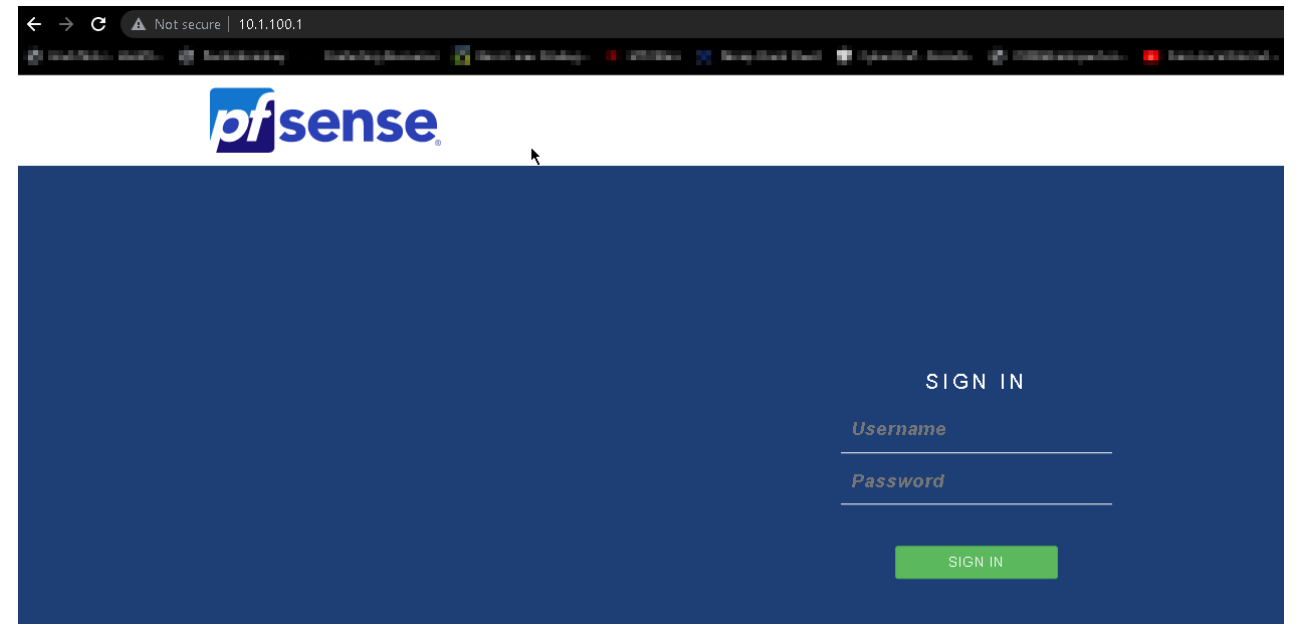
We successfully accessed the network using the VPN.
In this chapter, we explained how to implement pfSense in a simple network topology. We discussed pfSense and its features, including the various services available from this open-source solution. We also implemented the captive portal, proxy, and VPN for communication between different parties.
Leave a Reply